The setup screens, one by one. Checked against build 266.
Health & safety notice
The first screen you see: a reminder that Strathlon gives general guidance, not medical advice, with a box to accept before you continue.
WhereFirst launch›Before you start — your health & safety
What it is
Before Strathlon asks anything about you, it shows a short notice: the app gives general fitness and nutrition guidance, not medical advice, and you should check with a doctor before starting a new programme if you're unsure it's safe for you. A link opens the full Health & Safety terms.
Why it helps
You know what the app is (and isn't) for before you hand over any personal details.
How to use it
Read the notice. Tap Read the full Health & Safety terms if you want the complete wording.
Tick I have read and understood, and I accept the Health & Safety terms.
Tap Continue. It stays greyed out until the box is ticked.
Good to know
There's no way to skip this screen — it's the very first thing a new install shows, before your name or any other detail.
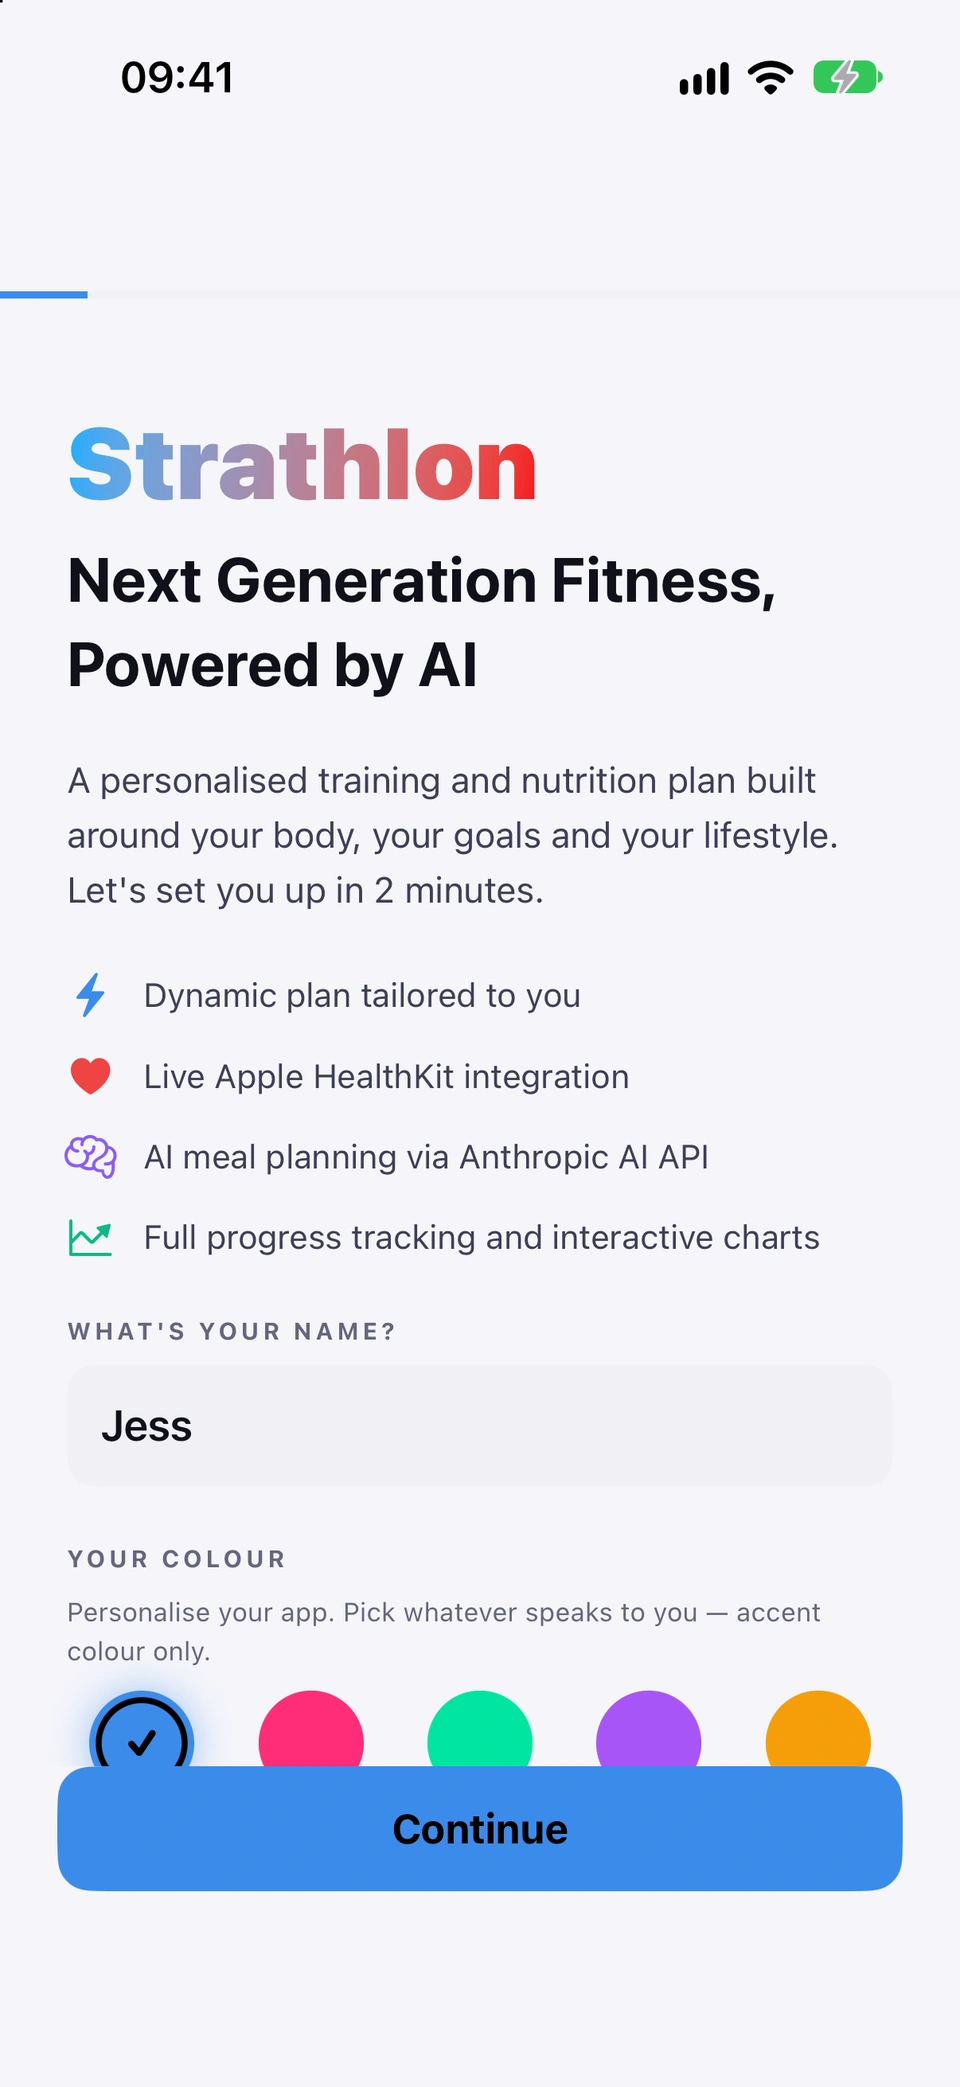
The first setup screen: a short introduction to Strathlon and a field for your name, which the app uses to greet you.
WhereSetup›welcome screen›WHAT'S YOUR NAME?
What it is
After the health & safety notice, Strathlon introduces itself — a personalised training and nutrition plan built around your body, goals and lifestyle — and asks for your name.
Why it helps
Your name is used for your greeting around the app (for example the AI coach's messages).
How to use it
The welcome screen.Type your name into the Enter your name field.
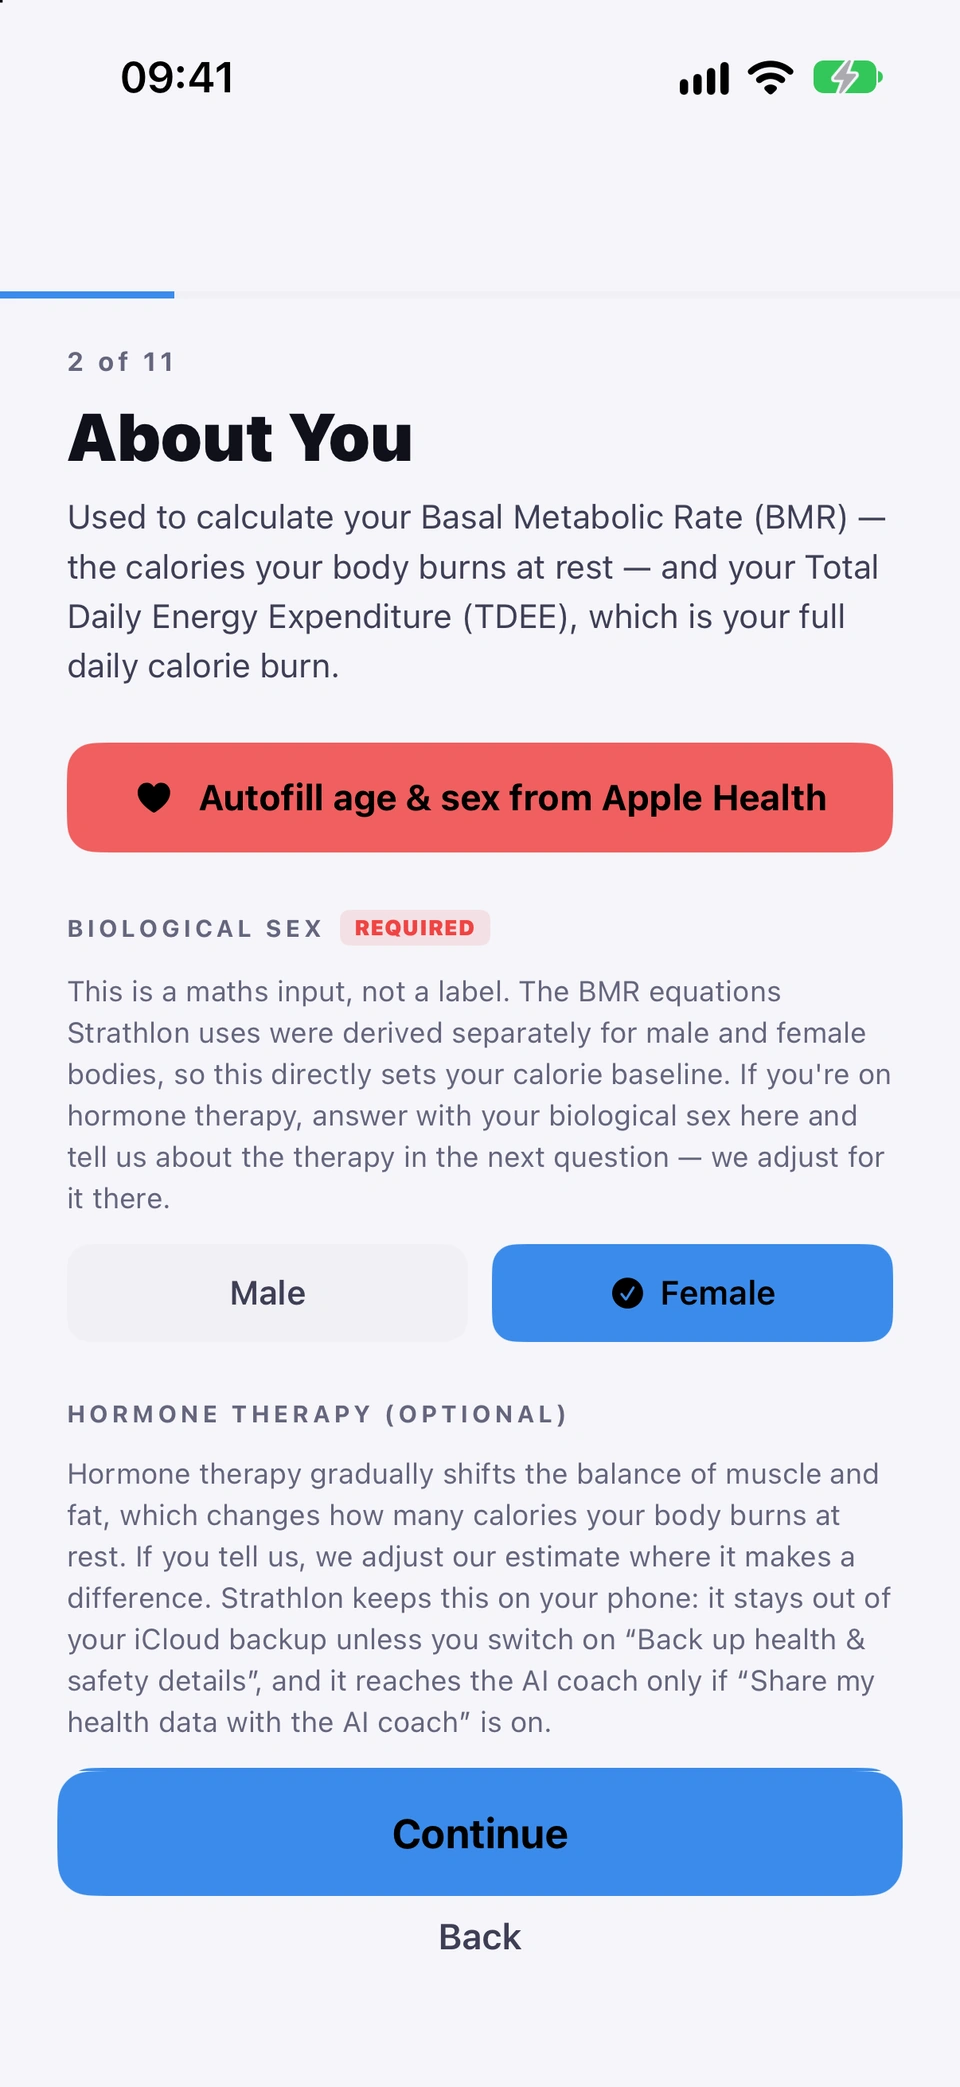
Asks your age and biological sex, both required, because the calorie formulas Strathlon uses differ for male and female bodies.
WhereSetup›About You
What it is
The About You screen asks for your age and your biological sex (male or female). Both are required, with no pre-filled default — you must actively choose. A red Autofill age & sex from Apple Health button can fill both in one go.
Why it helps
BMR (Basal Metabolic Rate — the calories your body burns at rest) is calculated with a different formula for male and female bodies, so this directly sets your calorie baseline.
About You: age and biological sex.
How to use it
Tap Autofill age & sex from Apple Health to import both at once, or enter them yourself below.
Under BIOLOGICAL SEX, choose Male or Female. If you're on hormone therapy, answer with your biological sex here — the next question is where you tell us about the therapy.
Under AGE, use the − / + buttons to set your age, then tap My age is age — confirm if you didn't already confirm it via Autofill.
Tap Continue.
Good to know
Neither field has a default — Continue stays blocked until you've explicitly chosen both, even if you imported from Apple Health.
An optional question for everyone, with HRT for menopause as one answer; testosterone or oestrogen therapy adjusts your calorie estimate.
WhereSetup›About You›HORMONE THERAPY (OPTIONAL)
What it is
Under HORMONE THERAPY (OPTIONAL), you can say you're not on hormone therapy (or prefer not to say), on HRT for menopause, on testosterone (masculinising), or on oestrogen (feminising). It's asked of everyone, not just one biological sex.
Why it helps
Hormone therapy gradually shifts the balance of muscle and fat, which changes how many calories your body burns at rest — telling Strathlon lets it adjust its estimate where it makes a difference.
How to use it
On the About You screen, choose the option under HORMONE THERAPY (OPTIONAL) that applies to you — or leave it on Not on hormone therapy / prefer not to say.
Good to know
Skipping it, or choosing 'Not on hormone therapy / prefer not to say', changes nothing about your targets.
HRT for menopause keeps your standard calorie estimate, and cycle features, if you use them, work as they do for anyone not on testosterone. When Health sharing is on, your coach hears it described as HRT for menopause.
You can change your answer later in Settings → Body & stats.
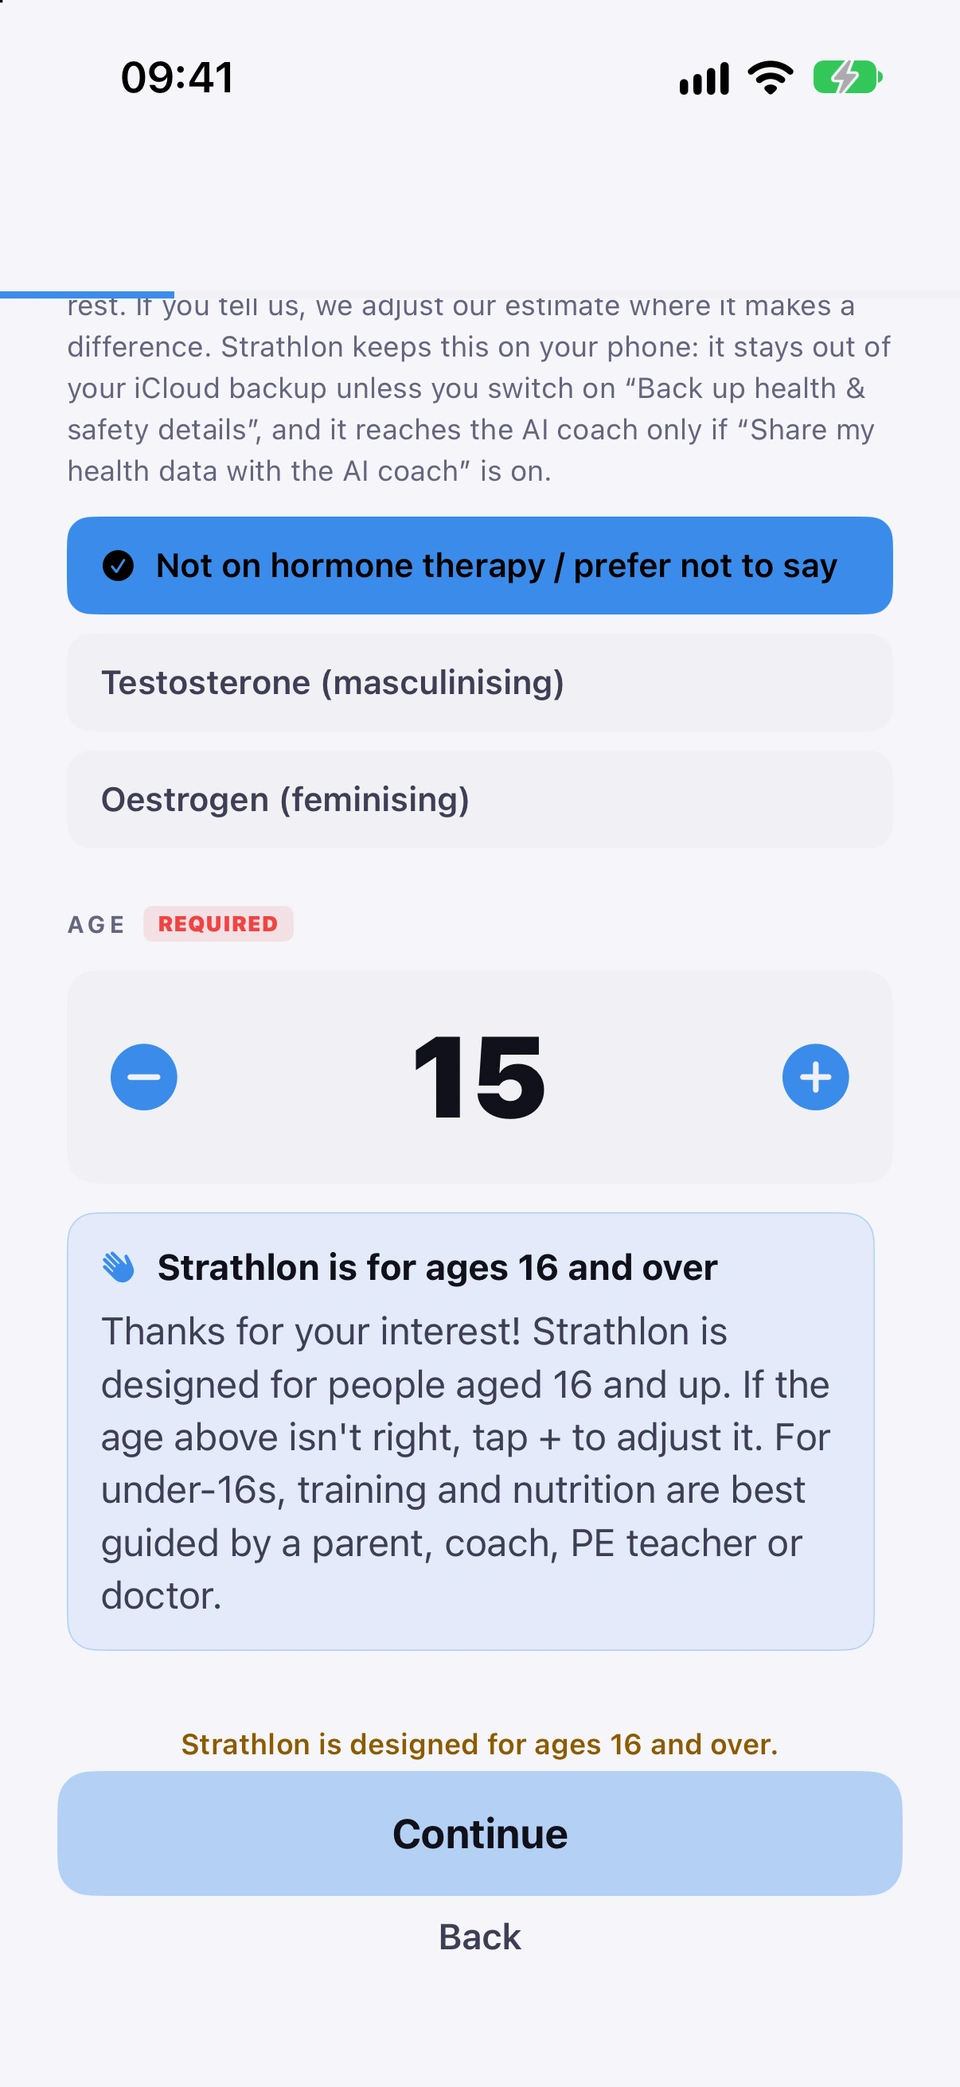
Strathlon is for ages 16 and over; entering a lower age shows a friendly explainer and you can't continue until it's corrected.
WhereSetup›About You›age field
What it is
If the age you've entered (typed or imported from Apple Health) is under 16, a note explains that Strathlon is designed for 16 and up, and suggests training and nutrition are best guided by a parent, coach, PE teacher or doctor below that age.
Why it helps
Keeps the app's guidance appropriate for the age it's built for.
Minimum age check.
How to use it
If your age shows as under 16, tap + to raise it to 16 or above.
Good to know
The manual age stepper itself never goes below 16 — an under-16 age can only appear via an Apple Health import.
Continue stays blocked until your confirmed age is 16 or over.
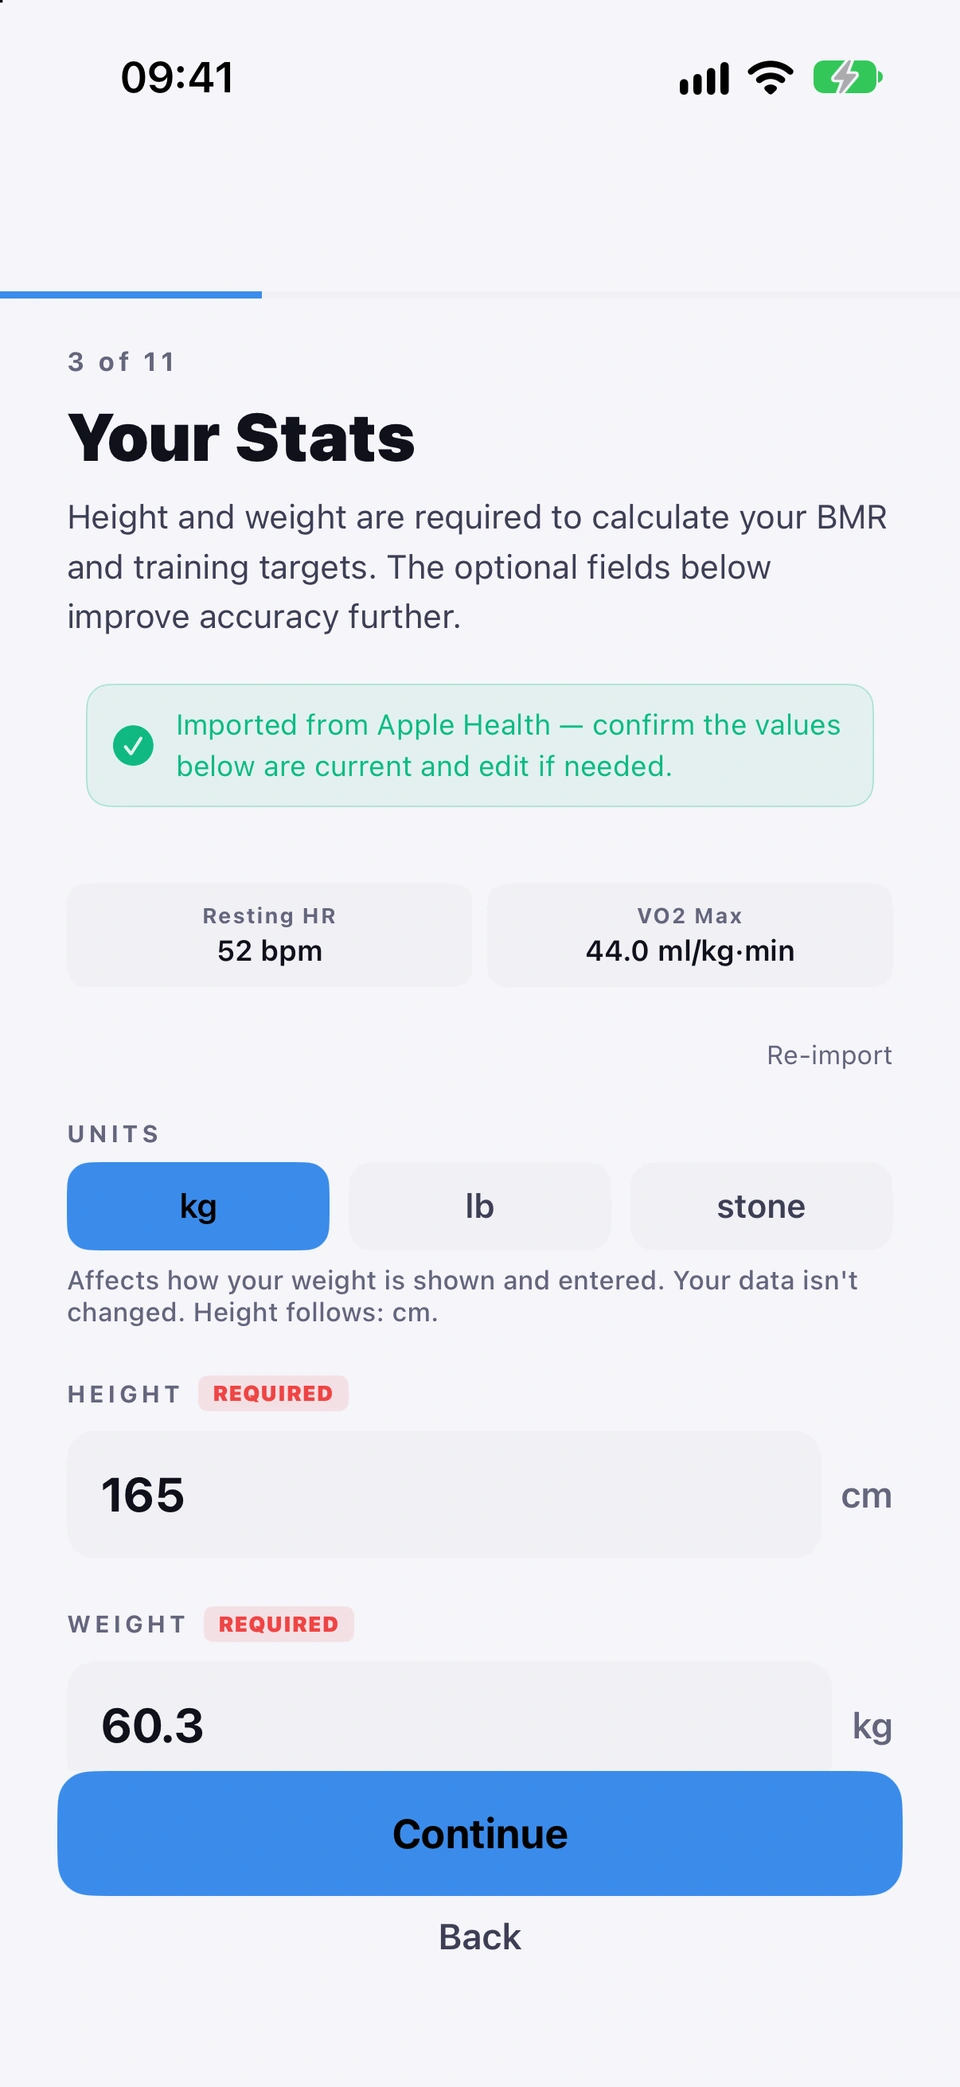
Height and weight are required; resting HR, VO2 max and body fat are optional — Apple Health autofill fills what it can.
Uses Apple Health
WhereSetup›Your Stats›Autofill from Apple Health
What it is
On Your Stats, height and weight are required. Resting heart rate, VO2 max, and body-fat % or lean mass are optional but improve accuracy. Autofill from Apple Health imports what Apple Health holds for all of these at once, for you to confirm or edit.
Why it helps
Filling these from Apple Health is faster than typing them, and an implausible reading (for example a resting heart rate that's really a workout heart rate) is refused rather than silently stored.
How to use it
Your Stats after Apple Health autofill.Tap Autofill from Apple Health and allow access when iOS asks.
Check the imported pills (Weight, Height, Age, Biological sex, Resting HR, VO2 Max, BMI, Body Fat). Tap Re-import to fetch again if something's missing.
Or skip the import and type your HEIGHT and WEIGHT directly, plus any of the optional fields.
Tap Continue.
Tips
Height and weight are the only two required fields on this screen — everything else can be left blank.
Good to know
An out-of-range resting heart rate or VO2 max — typed or imported — is refused with an explanation rather than stored; a previously saved value is kept rather than overwritten by a bad reading.
Age and biological sex are not re-imported here — they're set on the previous screen (see About You: age and biological sex) so this import can't silently overwrite a confirmed answer.
Choose kg, lb or stone for weight on the Your Stats screen — it only changes how numbers are shown and entered, not your stored data.
WhereSetup›Your Stats›UNITS
What it is
A three-way kg / lb / stone control on Your Stats sets the unit used for every weight field during setup (height follows automatically: cm for metric, ft/in for imperial).
Why it helps
Lets you enter your stats in the unit you actually think in.
How to use it
On Your Stats, under UNITS, tap kg, lb or stone.
Good to know
Changing the unit only changes how figures are displayed and typed — it never changes your stored data.
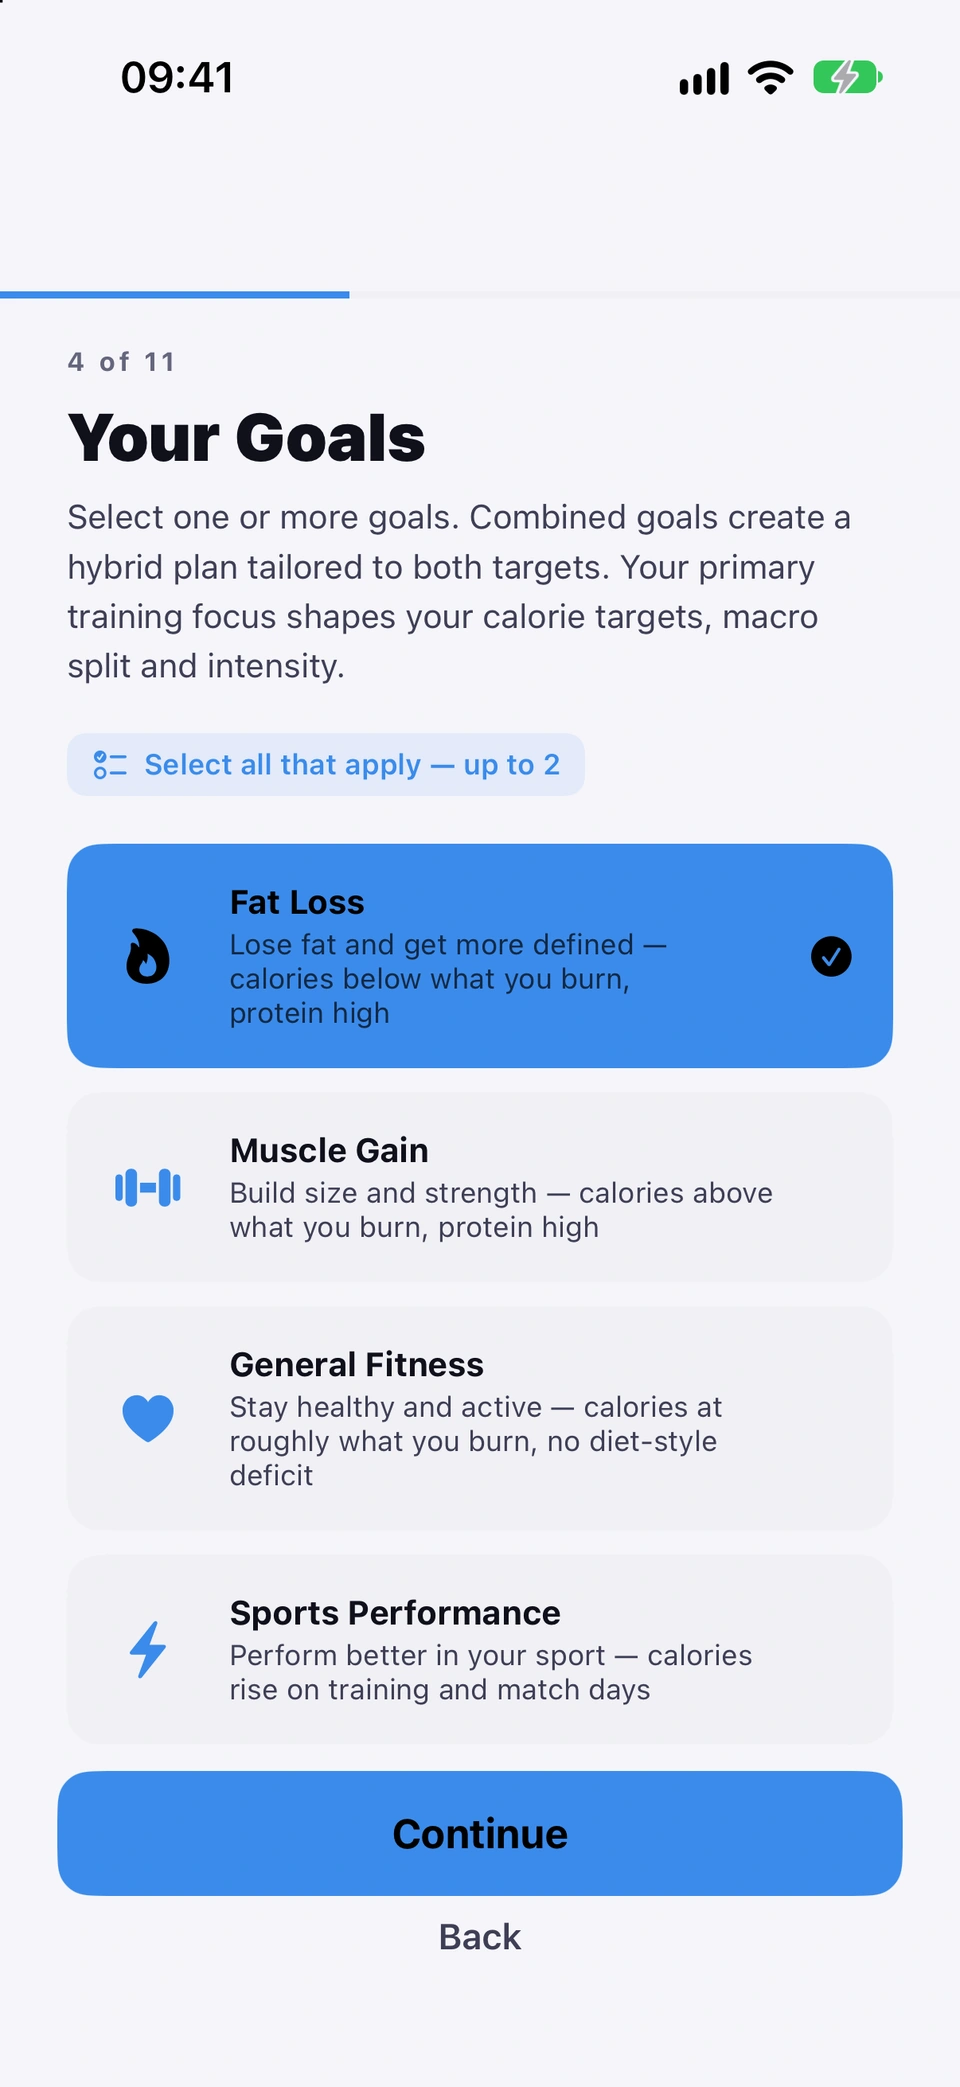
Pick one or two of Fat Loss, Muscle Gain, General Fitness and Sports Performance — combining two blends both into one plan.
WhereSetup›Your Goals
What it is
On Your Goals, choose up to two: Fat Loss, Muscle Gain, General Fitness or Sports Performance. Picking two creates one combined plan that works towards both.
Why it helps
Your primary training focus shapes your calorie targets, macro split and how quickly training intensity rises.
How to use it
Choosing your goals.Tap up to two goal cards.
With two goals already chosen, tap a selected one to swap it for a new pick.
Tap Continue.
Tips
Choosing both Fat Loss and Muscle Gain together sets up a recomposition approach — your calories sit at maintenance rather than a deficit or a surplus.
Good to know
16–17 year-olds aren't offered Fat Loss, and their calories never go into a deficit — the goal picker hides it for them.
Beginner, Intermediate or Advanced — sets how complex your plan is, how much volume it has, and how fast intensity increases week to week.
WhereSetup›Experience Level
What it is
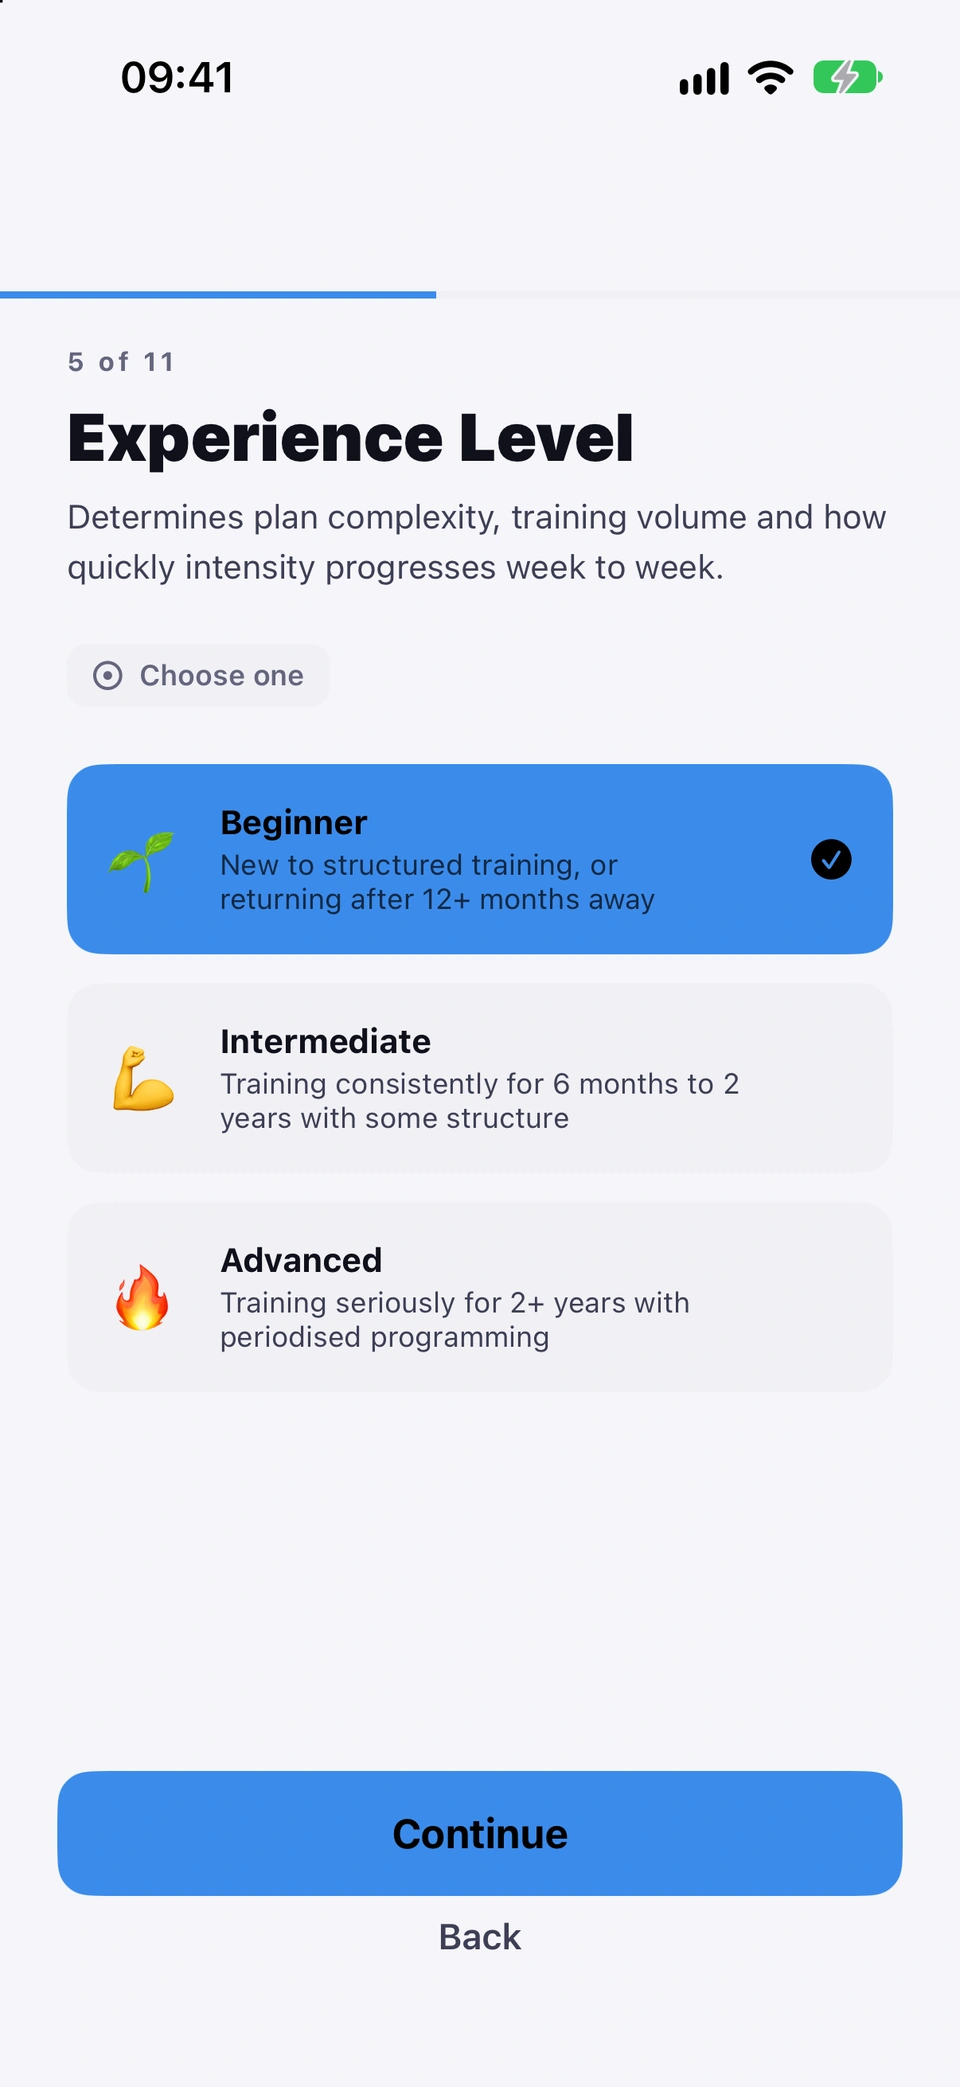
A single choice of Beginner (new to structured training, or returning after 12+ months away), Intermediate (training consistently for 6 months to 2 years) or Advanced (training seriously for 2+ years with periodised programming).
Why it helps
Determines plan complexity, training volume and how quickly intensity progresses week to week.
Experience level.
How to use it
Tap the card that matches you: Beginner, Intermediate or Advanced.
Set gym days per week, preferred days, gym/home/both and equipment, flag injuries, and say whether you can train twice in a day.
WhereSetup›Training Setup
What it is
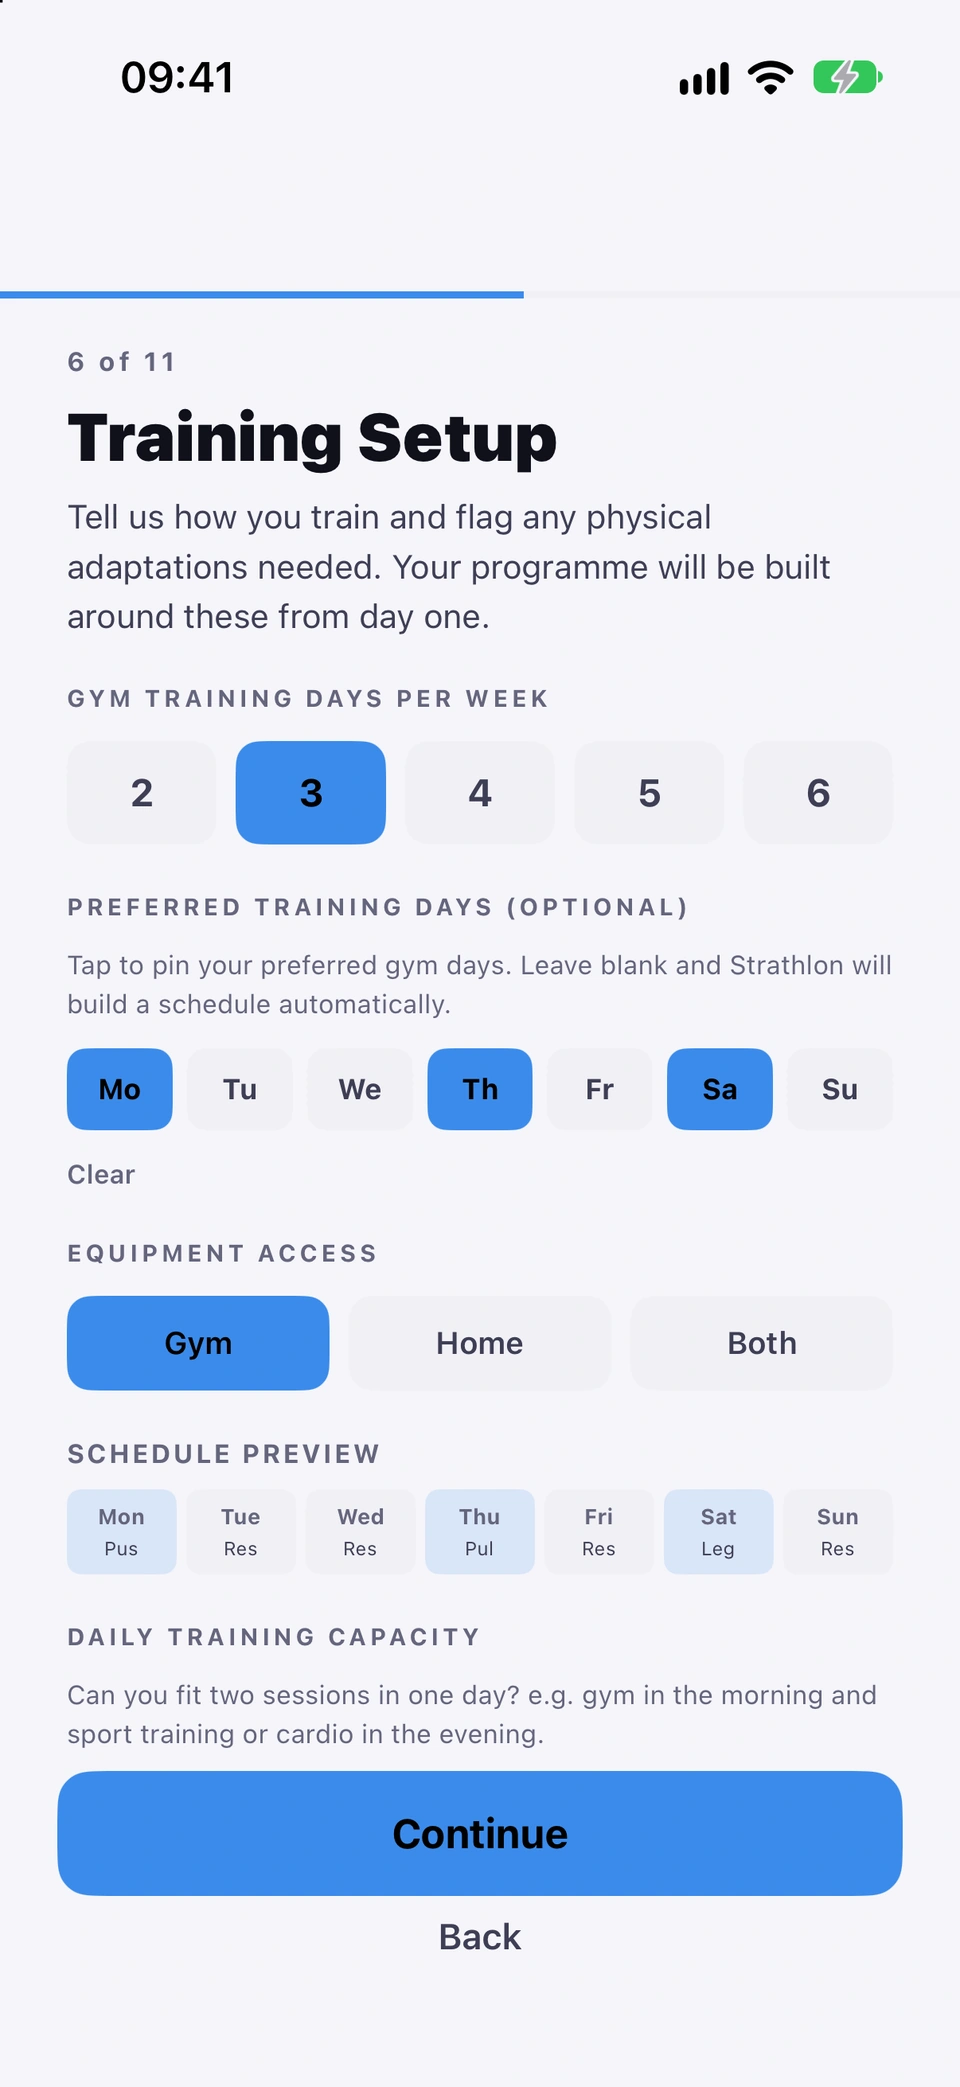
The Training Setup screen sets: gym training days per week (2–6), optional preferred days (or leave blank for an automatic schedule), equipment access (gym, home or both, with a home-equipment picker), any injuries to flag, and whether you can fit two sessions in one day. A live schedule preview shows the result.
Why it helps
Your programme is built around these from day one.
How to use it
Under GYM TRAINING DAYS PER WEEK, tap a number from 2 to 6.
Training Setup.Optionally tap days under PREFERRED TRAINING DAYS (OPTIONAL) to pin them — leave blank and Strathlon builds a schedule automatically.
Under EQUIPMENT ACCESS, choose Gym, Home or Both; if Home or Both, tick what you have under HOME EQUIPMENT.
Check the SCHEDULE PREVIEW strip to see the week Strathlon has worked out.
If you can train twice in a day, double-up gym work is paired to target muscles your sport hasn't already fatigued.
If you play a sport
WhereSetup›Training Setup›Can double up
What it is
When Can double up is on and you've picked a sport, double-up days are shown with a gym session paired to train the opposite muscle groups to what your sport primarily stresses — so you're never hitting already-fatigued muscles twice in a day. The pairings are listed under AUTO-ASSIGNED PAIRINGS.
Why it helps
Keeps a double-session day useful rather than overloading the same muscles your sport already worked.
How to use it
On Training Setup, under DAILY TRAINING CAPACITY, tap Can double up.
If you've already picked a sport, review the pairings under AUTO-ASSIGNED PAIRINGS.
Tap the ⓘ next to Smart pairing — muscle fatigue aware to read the research behind it.
Tips
You can adjust any pairing later in the schedule editor (Plan tab → schedule).
Good to know
Pairings only show once you've picked at least one sport — without a sport, double-up days just mean you're open to two sessions with no muscle-group logic applied.
Set your diet type, restrictions, cuisines, cooking time and allergies — used directly by the AI coach's meal plans.
WhereSetup›Food Preferences
What it is
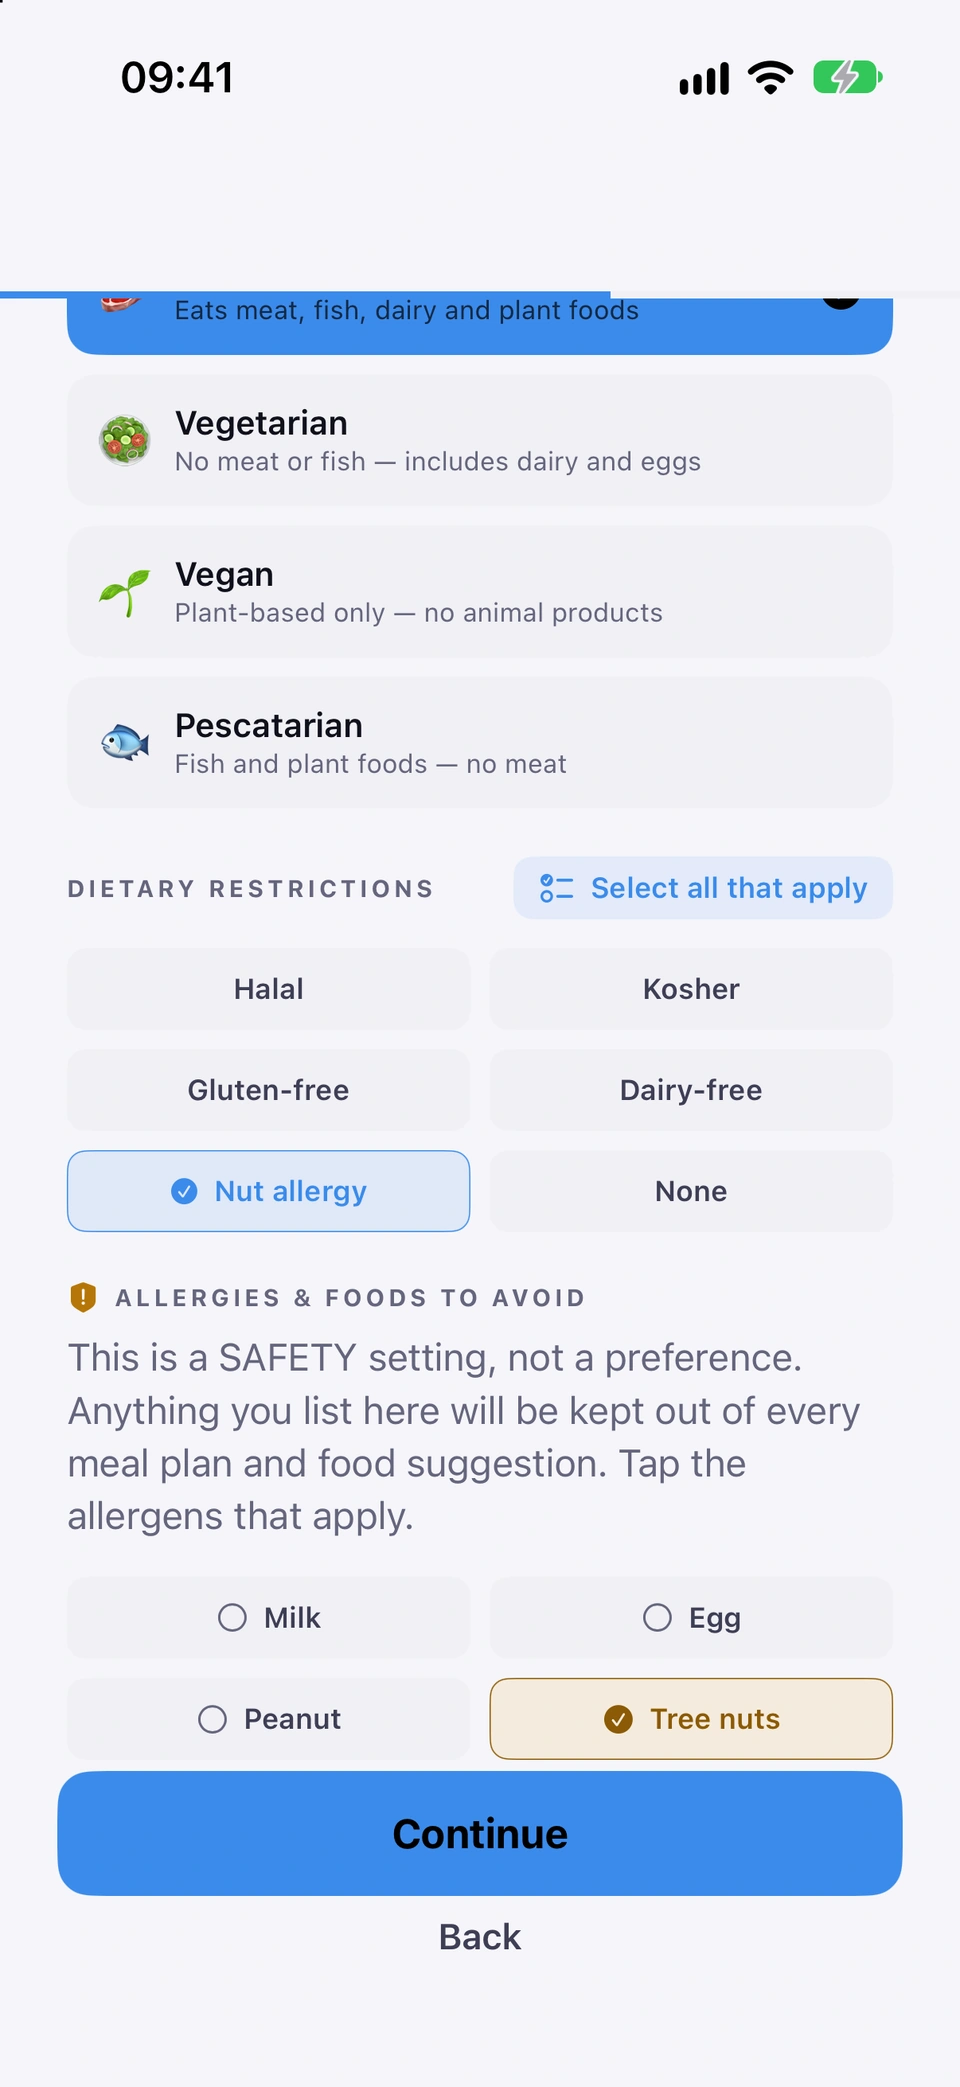
On Food Preferences you set: dietary type (omnivore, vegetarian, vegan, pescatarian), restrictions (halal, kosher, gluten-free, dairy-free, nut allergy and more), up to three cuisine preferences, a cooking-time preference, optional low-carb substitutions, food allergies, other foods to avoid, and supplement ingredients to avoid.
Why it helps
Helps your AI coach generate meal plans that actually suit you, not generic suggestions — these preferences are passed directly to your AI nutritionist.
How to use it
Choose your DIETARY TYPE.
Tick any DIETARY RESTRICTIONS that apply.
Food Preferences and allergies.Use NGAllergyPicker to add food allergies and other foods to avoid — this is safety-critical, so add it even if you skip everything else optional.
Under CUISINE PREFERENCES, pick up to three, or leave it on No preference — AI will suggest a variety.
Choose a COOKING TIME PREFERENCE.
Optionally tick any LOW-CARB SUBSTITUTIONS (OPTIONAL).
Tap Continue.
Good to know
Allergies and restrictions can be changed later in Settings → Food preferences at any time, not just here during onboarding.
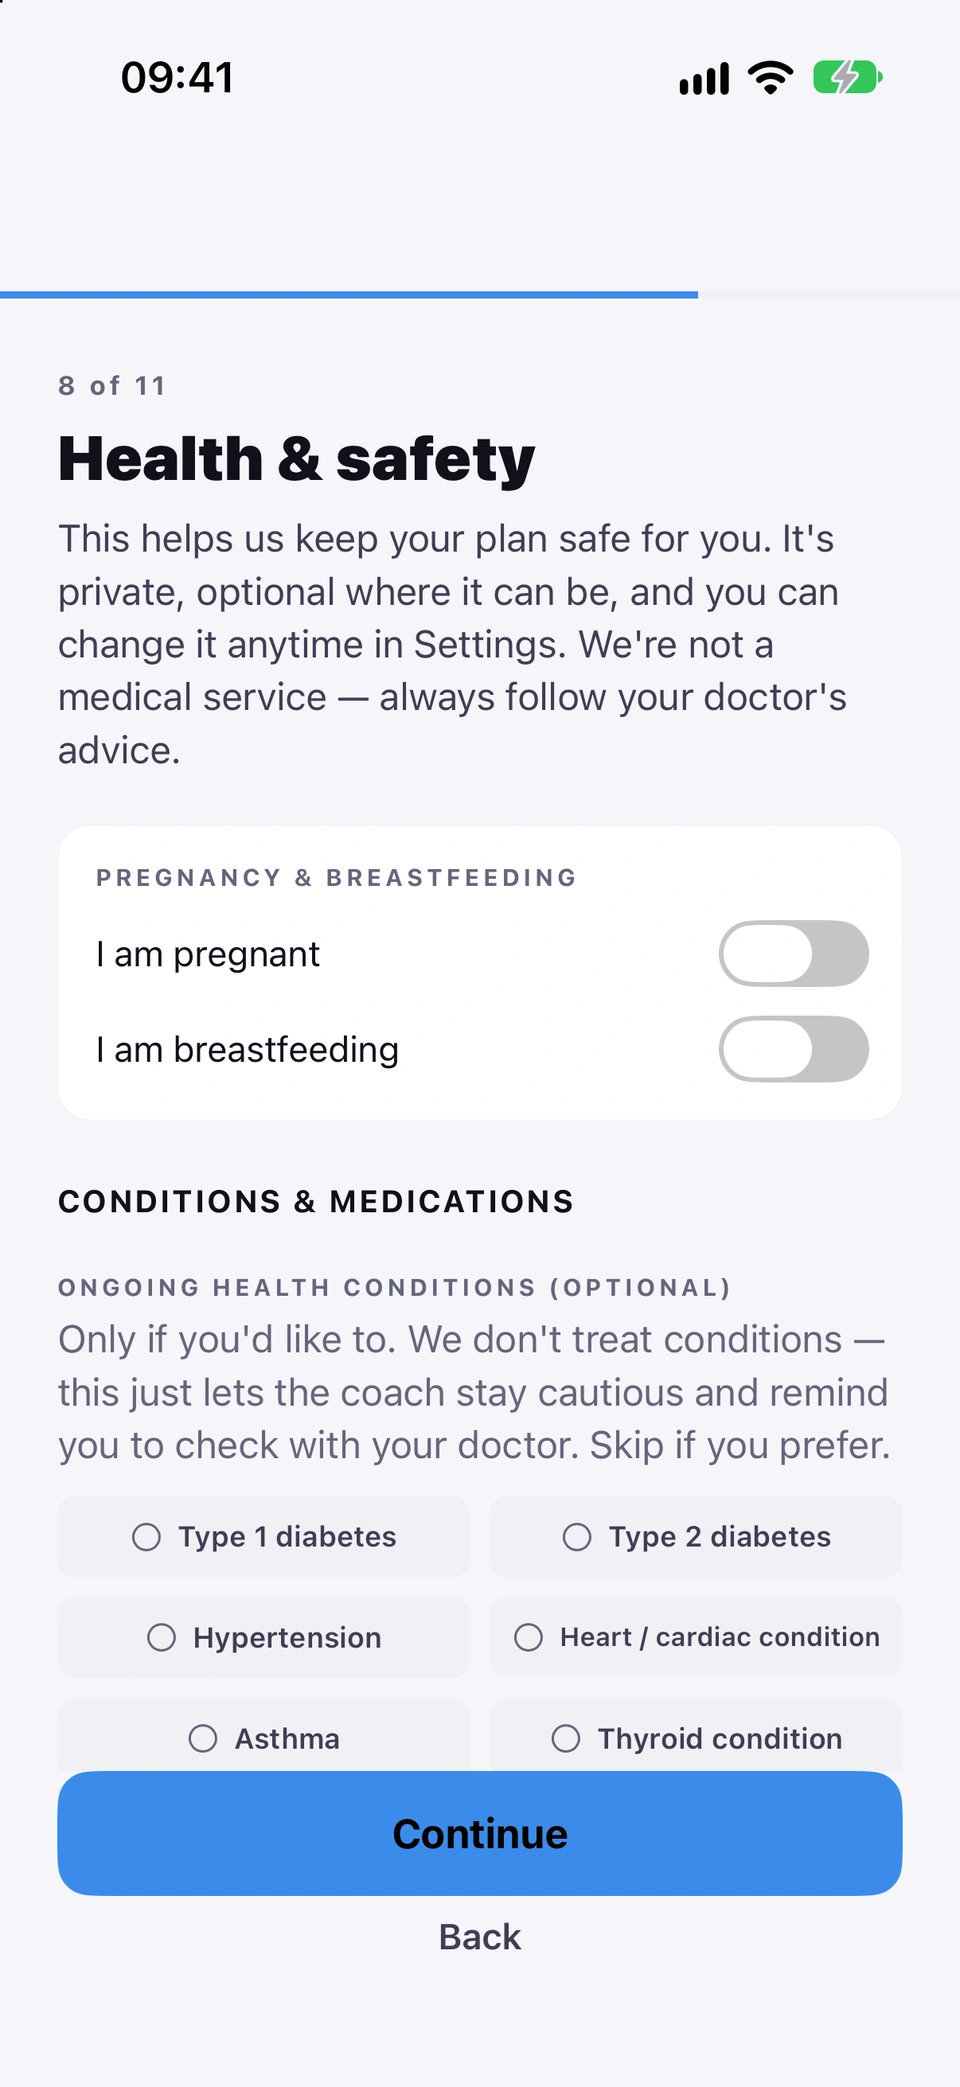
A private step for pregnancy, breastfeeding, conditions and medications, plus a short readiness check and two optional food questions.
WhereSetup›Health & safety
What it is
This step covers, in order: pregnancy & breastfeeding (everyone is asked, not just one biological sex), ongoing health conditions and medications that affect readings, two optional questions about your relationship with food, and a short physical-activity readiness check (a plain-language version of the standard PAR-Q-style questions).
Why it helps
This helps Strathlon keep your plan safe for you. It's private, optional where it can be, and you can change it anytime in Settings.
The Health & safety step in setup.
How to use it
Under PREGNANCY & BREASTFEEDING, tell us if either applies. If you tick I am pregnant, read A note about pregnancy and choose End my programme (recommended) or I understand — don't end my programme.
Under ONGOING HEALTH CONDITIONS (OPTIONAL) and MEDICATIONS THAT AFFECT OUR READINGS (OPTIONAL), add anything that applies — or skip.
Under YOUR RELATIONSHIP WITH FOOD, answer the two yes/no questions — there are no wrong answers and you're never blocked.
Under PHYSICAL ACTIVITY READINESS, answer the readiness questions.
Tap Continue.
Tips
If you tell us you're pregnant, your Plan tab stops setting sessions and shows the UK Chief Medical Officers' and NHS activity guidance instead, with the source named on screen; your calories stay at what you burn.
If you flag a relationship-with-food concern, your plan stays at a gentle maintenance and tracking nudges ease off — you're always in control.
Good to know
Your two relationship-with-food answers and your readiness flags are never sent to the AI coach as your actual answers — only the fact that something was flagged (see Share health data with the coach (consent)).
This app gives general information, not medical advice — always follow your doctor's, midwife's or prescriber's guidance.
Choose any number of sports, or No Sport — with more than one, the order sets which is your main sport.
WhereSetup›Your Sport(s)
What it is
Pick sports from a categorised, filterable list (or 🚫 No Sport). Selecting more than one shows a reorder list — the top sport is your primary (P1).
Why it helps
Each sport gets its own schedule, session types and nutrition targets; match and practice days have different calorie demands, all factored automatically.
How to use it
Use the category chips to filter, or leave All selected. Pilates, Yoga and Barre sit under Gymnastics & Fitness.
Tap each sport you play, or tap 🚫 No Sport if you don't play one.
With two or more sports picked, use the chevrons under YOUR SPORTS to reorder — the top one is P1, your main sport.
Tap Continue.
Tips
If Sports Performance is one of your goals, your gym workouts include exercises for your top two sports — reordering the list changes which two that is.
Good to know
Reordering your sports does not change how sport calories are counted — each session's calorie bonus is worked out from what it burns, not from priority.
For each sport, set matches and practices per week, length, session type, preferred days, season and intensity.
If you play a sport
WhereSetup›Schedule Setup
What it is
One configuration card per sport: matches per week and duration, practices per week and duration, match/practice session type, optional preferred days, whether it's year-round or seasonal, and intensity.
Why it helps
Strathlon auto-assigns days, but lets you adjust if you have fixed days — for example matches always on a Saturday.
How to use it
Tap a sport's card to expand it.
Set matches and practices per week and their typical length.
Pick a season window, or leave it year-round.
Turn on Allow Double-Session Days if you want gym and sport on the same day.
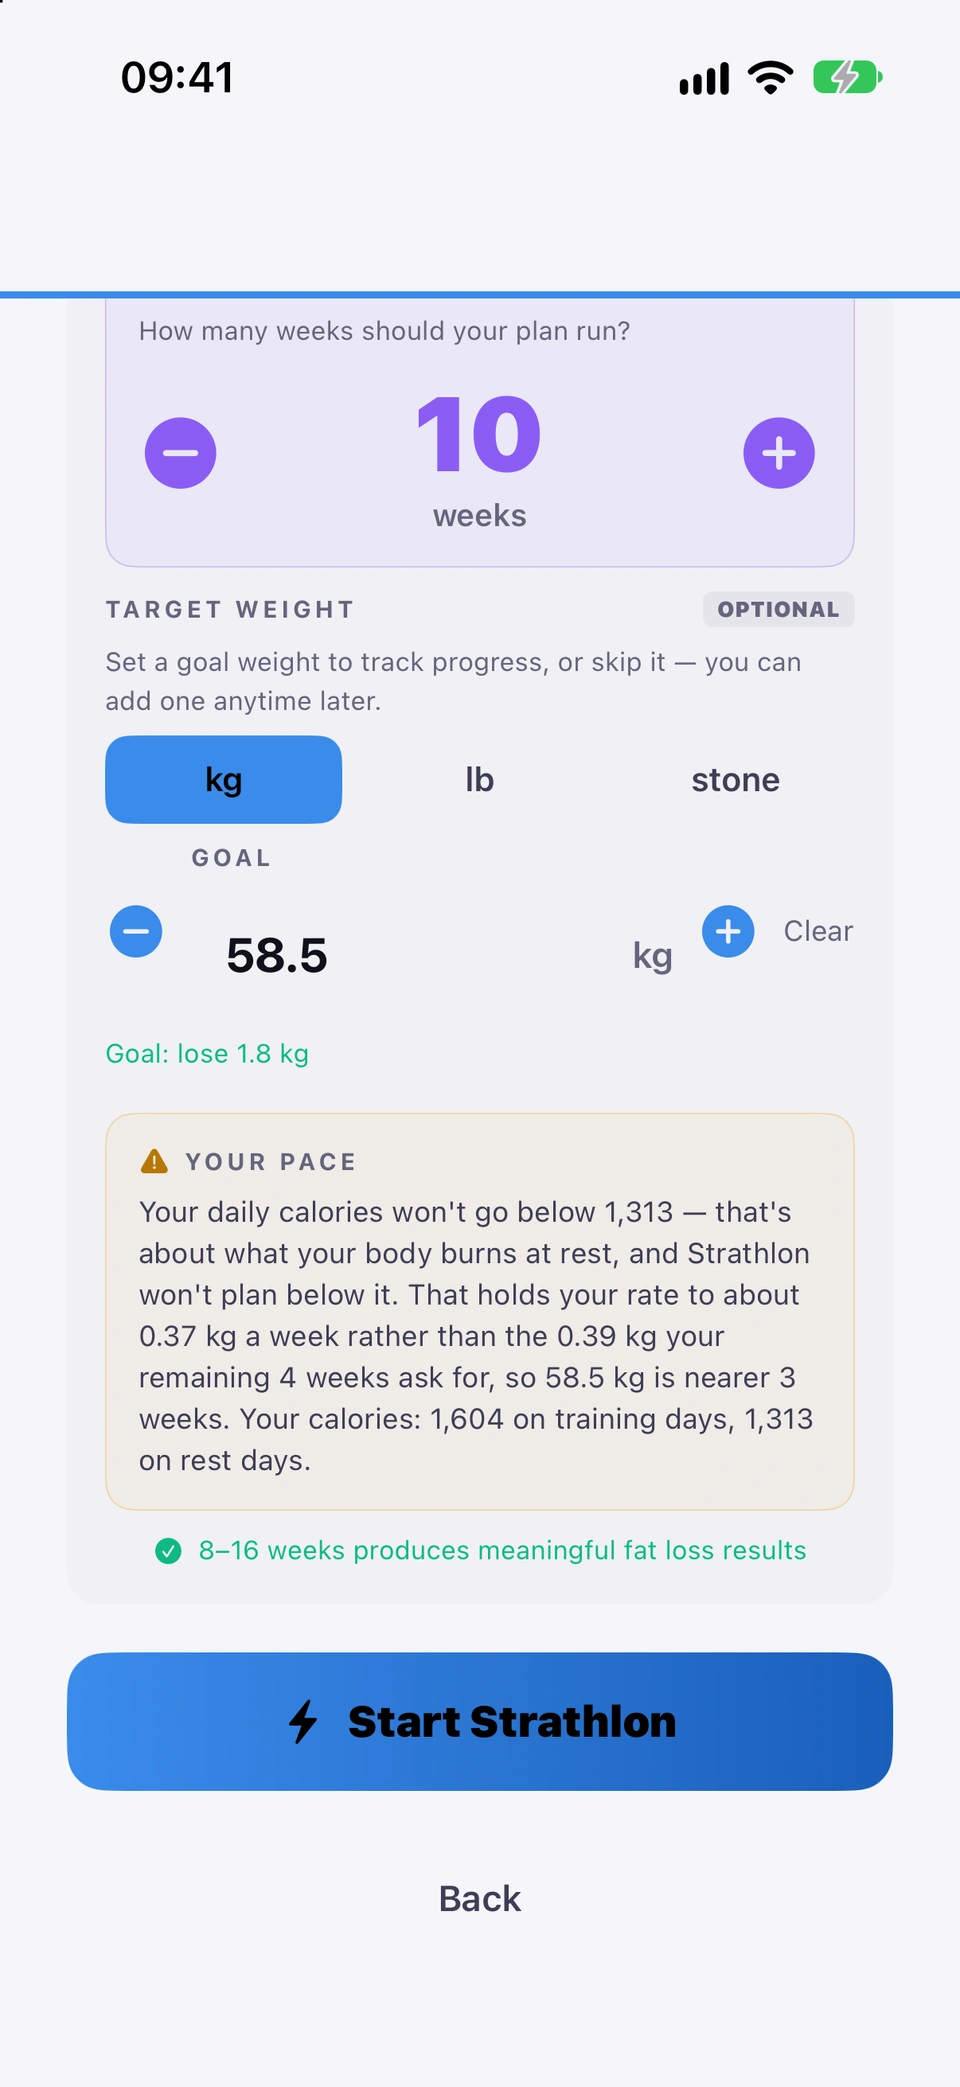
Shows your calculated targets, asks how many weeks your plan should run, and lets you set an optional goal weight before starting.
WhereSetup›Your Plan is Ready
What it is
A summary card of your calculated training-day and rest-day calories, macro targets, BMR and max heart rate, plus a required PROGRAM DURATION (4-52 weeks) and an optional goal weight (see Goal weight during setup).
Why it helps
Lets you see and confirm what Strathlon has worked out before you commit to it.
How to use it
Your Plan is Ready.Review the calculated targets on the card.
Under PROGRAM DURATION, use − / + to set how many weeks your plan should run, then tap Use weeks weeks — confirm.
Start Strathlon stays blocked until you've confirmed a plan duration, and if your target weight contradicts your goal (for example a higher target under Fat Loss) until that's fixed.
Goal weight during setup
An optional target weight on the last setup screen, with warnings if the pace looks fast or the target contradicts your goal.
WhereSetup›Your Plan is Ready›TARGET WEIGHT
What it is
On Your Plan is Ready, TARGET WEIGHT is optional — set it to track progress, or skip it and add one anytime later.
Why it helps
Gives you a weight target to track progress against, if you want one.
How to use it
Under TARGET WEIGHT, pick your unit if needed, then use the stepper to set a goal weight.
Read any note that appears — a gentle nudge if the pace looks fast, or a red warning if the target contradicts your goal (which also blocks Start Strathlon).
Good to know
Leaving it blank is fine — you can add a goal weight anytime later.
A target weight that contradicts your selected goal (for example a higher target under Fat Loss) must be fixed before you can start.